
Assume that you have more than a hundred videos in your database. In such cases, it is not easy to manage all your videos without categorization. So we have made categorization mandatory before adding your videos — every video must be assigned to a category.
Categories can be nested, so you can group them under a parent category as deeply as you need.
Check the steps below to create a new Category.
1. Login to your Joomla backend.
2. Select Components –> All Video Share –> Categories –> New.
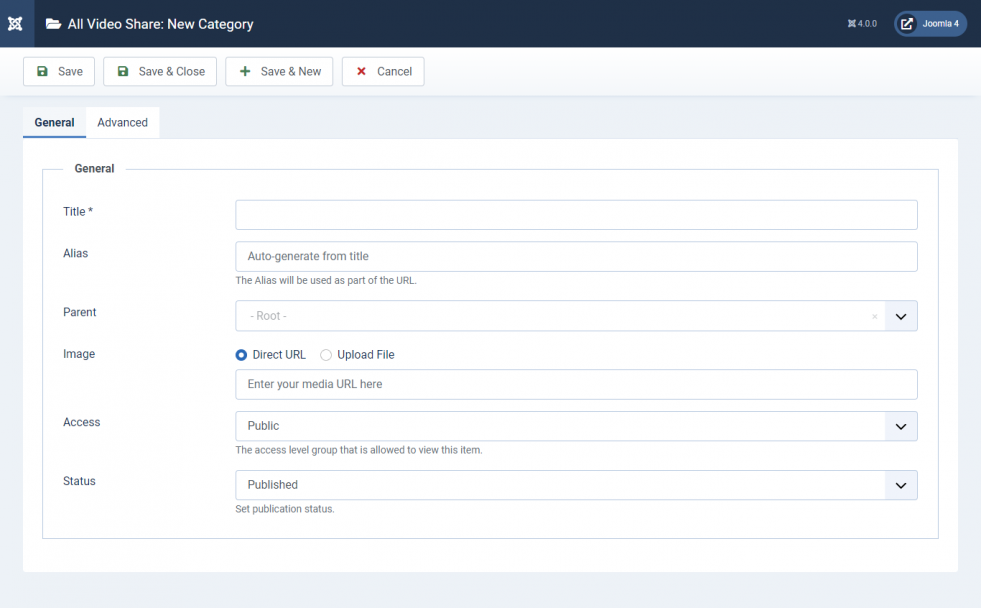
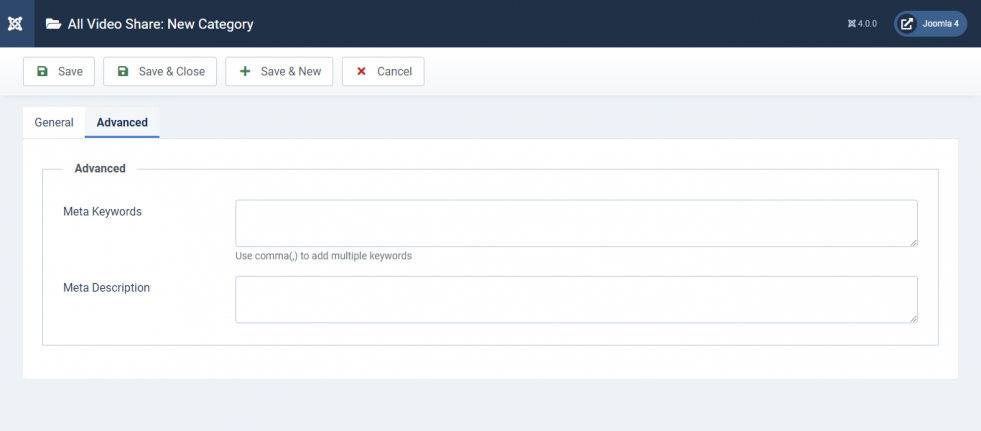
3. Fill up the form according to the following tables. Title is the only required field — everything else is optional.
General Settings
| Properties | Description | Example |
|---|---|---|
| Title | Title of the category. This is the only required field. | My First Category |
| Alias | Used to build a human readable URL for your category page. Leave it empty and it is generated from the title automatically. If the alias is already in use, a number is appended to keep it unique. | my-first-category |
| Image | Thumbnail image used as the identifier for the category in your galleries. Upload a JPEG, PNG, GIF or WebP file, or enter the URL of an existing image. | thumb.jpg |
| Description | A description of the category, shown on the category page. Accepts formatted text. | Videos from my first category |
| Parent | Choose a parent to nest this category underneath it. Leave it as — Root — for a top-level category. | — Root — |
| Access | The Joomla view access level required to see this category. Any access level defined on your site can be chosen. | Public |
| Status | Published, Unpublished, Archived or Trashed. Only published categories appear on your site. | Published |
Advanced Settings
| Properties | Description | Example |
|---|---|---|
| Meta Keywords | Custom meta keywords for your category page. Use a comma (,) to separate multiple keywords. | all video share, Joomla player |
| Meta Description | Custom meta description for your category page. | My Category Page |
4. Click the Save button at the top left corner.
5. Congrats! You have successfully added a new Category.
The Alias is what appears in your category’s URL. You can change it at any time, but any existing links to the old address will stop working — so avoid changing it once the page has been published and shared.